Table of Contents
Identify facial ingrown hairs early as firm red bumps with dark centers before infection sets in. Soften skin using warm compresses for 10 to 15 minutes three to four times daily to bring trapped hairs to the surface. Extract using alcohol-sterilized tweezers to lift the hair loop without digging downward into skin. Apply salicylic acid or benzoyl peroxide immediately after to kill bacteria and reduce inflammation. Prevent recurrence by shaving with hair growth direction, exfoliating two to three times weekly, and keeping skin hydrated.
Question | Answer |
|---|---|
How do I identify a facial ingrown hair before it gets infected? | Look for firm red bumps with dark specks at the center on shaved or waxed areas that feel tender like peas under the skin. |
What is the safest way to prepare skin for extraction? | Apply warm compresses for 10 to 15 minutes three to four times daily until the hair loop emerges naturally. |
Which tools work best for removing ingrown hairs? | Use alcohol-sterilized pointed tweezers and a sterile needle along with a magnifying mirror to see the hair angle clearly. |
How do I prevent scarring after removing an ingrown hair? | Apply silicone gel and vitamin C serum daily once the wound closes while using SPF 30 or higher to block UV damage. |
What shaving technique prevents future ingrowns? | Shave with hair growth direction using single-blade razors and exfoliate with chemical acids two to three times weekly. |
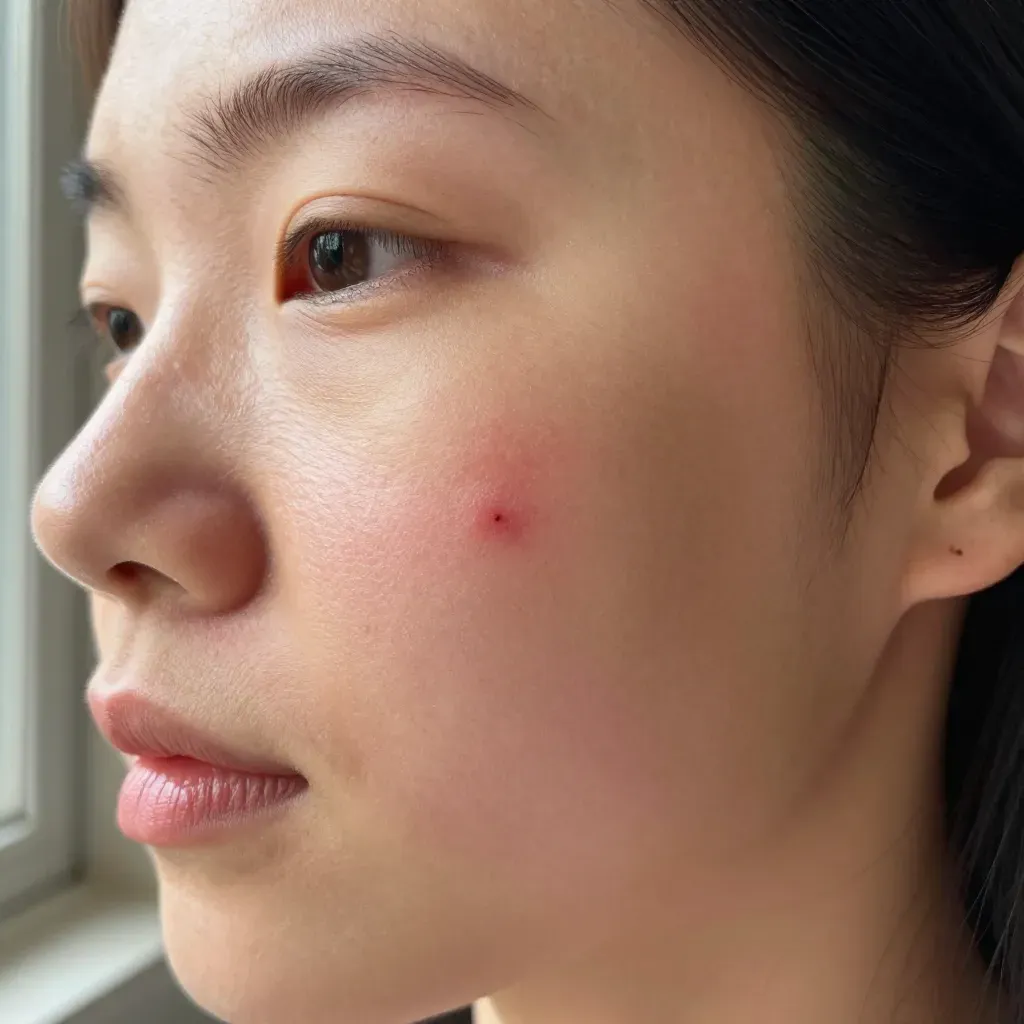
Identify ingrown hairs early before they become infected
Facial ingrown hair removal starts with spotting the problem before it festers. Look for small red bumps on cheeks chin or neck where you shave wax or pluck. These spots feel tender when touched and may show a tiny dark dot at the center. That dot is the trapped hair tip.
Visual warning signs
- Raised red bump with whitehead-like appearance
- Dark speck visible under skin surface
- Swelling around hair follicle opening
- Skin thickening or hyperpigmentation
- Shadow or line where hair grows sideways
Texture and pain indicators
Run clean fingers across the area. Ingrowns feel like firm peas under skin. They hurt when pressed unlike regular pimples. The spot stays itchy or burning for days without draining. You might see the hair loop above skin or feel it catching on fabric.
Infection red flags
Early stage | Red bump slight tenderness no pus |
|---|---|
Moderate | White pus yellow crust increased swelling |
Severe | Spreading redness warmth fever red streaks |
Stop all facial ingrown hair removal attempts if you see pus or feel heat. These signal bacterial infection. Picking spreads bacteria and causes keloid scarring especially on darker skin tones. Wait until inflammation drops or see a dermatologist.
Check your face daily after shaving. Early detection makes extraction easier and prevents permanent marks. Men with coarse beards and women who wax upper lips face higher risks. Spotting the issue within 24 to 48 hours stops the cycle before it starts.
Soften skin with warm compresses before attempting removal
Hard skin traps hairs deeper. Heat softens the epidermis and dilates pores. This brings the hair loop closer to the surface where you can grab it without digging.
Heat application steps
- Soak clean washcloth in hot water not scalding
- Wring out excess liquid
- Press against the bump for 10 to 15 minutes
- Repeat 3 to 4 times daily until hair emerges
- Apply gentle pressure in circular motions to encourage surfacing
Timing and temperature
Water temp | Warm to hot 104 to 110 degrees F |
|---|---|
Session length | 10 to 15 minutes |
Frequency | 3 to 4 times daily |
Duration | 1 to 3 days until hair visible |
Steam from a hot shower works too. Stand in steam for 10 minutes then inspect the area. The hair may pop above skin level on its own.
Never use boiling water. Burns damage skin and worsen scarring. Skip this step if the area shows pus or active infection. Heat spreads bacteria in infected tissue. Wait for antibiotics to clear infection first.
After compressing the skin looks pink and feels pliable. This is your window to act. The hair sits higher and the follicle opening relaxes. Attempt extraction within 30 minutes before skin cools and tightens again.
Use sterile tools to lift the hair loop without digging
Dirty tools introduce bacteria and cause infection. Clean everything with rubbing alcohol before touching your face. Soak tweezers and needles for five minutes. Let them air dry on a clean paper towel.
Tool selection
Pointed tweezers | Grab exposed hair loop precisely |
|---|---|
Sterile needle | Lift skin surface only when needed |
Magnifying mirror | See the hair angle clearly |
Extraction technique
- Locate the hair loop under bright light
- Slide needle tip parallel to skin surface
- Hook the hair loop gently upward
- Grab exposed end with tweezers
- Pull in direction of natural growth
- Stop if you meet resistance or bleeding starts
If the hair refuses to surface abort the attempt. Apply another warm compress and try tomorrow. Forcing extraction tears follicles and pushes hair deeper. This causes keloid scarring on facial skin.
After extraction wipe the area with alcohol or antiseptic. Apply a thin layer of antibiotic ointment. Leave the site alone. Do not shave over the spot for 48 hours.
Apply topical treatments to reduce inflammation and prevent scarring
Act fast after extraction. Open follicles absorb treatment better and heal faster. Apply products within five minutes while skin remains receptive. Delayed treatment allows bacteria to enter and inflammation to set.
Anti-inflammatory options
Salicylic acid 2% | Unclogs pores reduces swelling exfoliates gently |
|---|---|
Benzoyl peroxide 2.5% | Kills bacteria prevents infection dries excess oil |
Hydrocortisone 1% | Calms redness itching fast reduces immune response |
Tea tree oil diluted | Natural antiseptic reduces bump size fights microbes |
Scar prevention protocol
- Apply silicone gel twice daily once wound closes completely
- Use vitamin C serum every morning to fade dark marks
- Avoid picking scabs that form over extraction site
- Keep area moisturized with fragrance-free non-comedogenic lotion
- Sleep on clean pillowcases to prevent reinfection
Dark spots linger for months without sun protection. Apply SPF 30 or higher every morning even on cloudy days. UV rays darken post-inflammatory hyperpigmentation and make scars permanent. Reapply every two hours if outdoors.
Continue treatment for one week minimum after extraction. Stop immediately if rash or burning occurs. Switch to gentler alternatives if irritation persists. Consistent care prevents the pitted scars common on facial skin and keeps pores clear for future hair growth.
Prevent future ingrowns with proper shaving techniques and exfoliation
Stop the cycle before it starts. Change how you remove facial hair and dead skin buildup.
Shaving protocol
- Shave with hair growth direction never against
- Use single-blade razors or electric trimmers with guards
- Apply shaving gel and let it sit for two minutes first
- Rinse blade after every stroke
- Replace cartridges every five to seven uses
Exfoliation schedule
Chemical exfoliants | Salicylic or glycolic acid 2 to 3 times weekly |
|---|---|
Physical scrubs | Gentle microbead-free formula once weekly maximum |
Timing | Exfoliate night before shaving not same day |
Dull blades drag and cut hair below skin level. This forces hairs to grow sideways under the epidermis. Proper technique keeps ends above the surface where they belong.
Consider permanent solutions if ingrowns persist. At-home laser devices reduce regrowth density and eliminate shaving trauma entirely. Professional treatments target coarse facial hair that causes recurring scarring issues.
Moisturize daily with non-comedogenic lotion. Dry skin traps hairs. Hydrated skin releases them naturally.